Executive Summary
Effective warehouse layout design directly impacts operational efficiency, labor productivity, and customer service levels. This comprehensive manual provides systematic frameworks for analyzing, designing, and optimizing warehouse layouts, serving as an essential reference for operations professionals seeking to maximize space utilization while streamlining material flow and workflows.
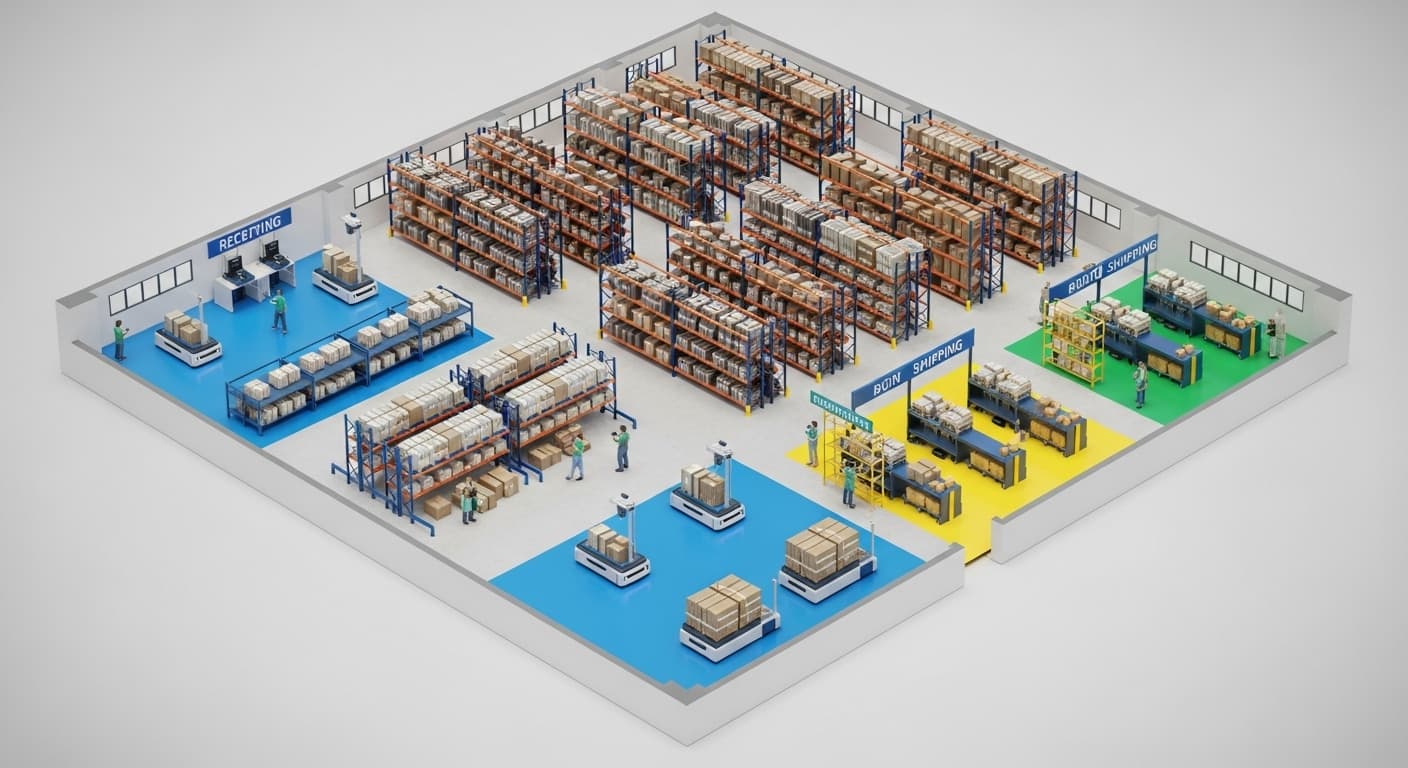
Warehouse Layout Optimization Manual: Maximizing Efficiency Through Strategic Design
(仓库布局优化手册:通过战略设计实现效率最大化)
1 · Fundamentals of Warehouse Layout Design
The science of warehouse layout optimization combines industrial engineering principles, operational research, and practical logistics experience to create facilities that maximize throughput while minimizing costs and errors. Understanding these fundamentals provides the foundation for effective warehouse design and continuous improvement.
Core Principles of Efficient Layout Design
The Five Pillars of Warehouse Layout: Every successful warehouse layout optimization rests on fundamental principles that guide design decisions:
Space Utilization:
- Cubic Optimization: Maximizing use of vertical space, not just floor area
- Density Balance: Achieving optimal storage density without compromising accessibility
- Flexible Configuration: Designing for adaptability to changing requirements
- Dead Space Elimination: Identifying and repurposing underutilized areas
Material Flow Efficiency:
- Linear Flow Patterns: Minimizing backtracking and cross-traffic in material movement
- Gravity Utilization: Leveraging gravity flow where possible to reduce handling
- Congestion Prevention: Designing adequate staging areas and traffic lanes
- Distance Minimization: Reducing travel distances for high-frequency activities
Labor Productivity:
- Ergonomic Design: Positioning items to minimize reaching, bending, and lifting
- Walk Sequence Optimization: Logical arrangement reducing picker travel time
- Batch Processing: Enabling efficient batch picking and processing
- Automation Integration: Preparing layouts for current or future automation
Safety and Compliance:
- Clear Traffic Patterns: Separated pedestrian and equipment pathways
- Emergency Access: Unobstructed emergency exits and fire lanes
- Load Stability: Proper weight distribution and stacking configurations
- Regulatory Compliance: Adherence to OSHA, fire codes, and industry standards
Operational Flexibility:
- Seasonal Adaptability: Capability to handle volume fluctuations
- Product Mix Changes: Accommodation of varying product characteristics
- Growth Accommodation: Scalability for business expansion
- Technology Evolution: Readiness for new technologies and automation
Understanding Warehouse Types and Their Layout Requirements
Distribution Center Layouts: High-velocity operations requiring rapid throughput:
| Characteristic | Layout Implication | Design Priority |
|---|---|---|
| High SKU velocity | Wide aisles for equipment | Throughput over storage density |
| Cross-docking operations | Linear flow design | Minimal storage, maximum flow |
| Multiple carriers | Extensive staging areas | Dock door optimization |
| Time-sensitive orders | Strategic pick zones | Speed over space efficiency |
Manufacturing Warehouse Layouts: Supporting production with raw materials and finished goods:
- Raw Material Zones: Bulk storage areas near receiving
- Work-in-Process Areas: Flexible spaces for production staging
- Finished Goods Organization: Efficient loading for customer shipments
- Quality Control Zones: Dedicated inspection and quarantine areas
E-commerce Fulfillment Centers: Optimized for individual order picking:
- Forward Pick Areas: Fast-moving items in easily accessible locations
- Bulk Reserve Storage: Replenishment inventory in high-density storage
- Packing Stations: Efficient pack-out areas with shipping supplies
- Returns Processing: Dedicated reverse logistics zones
Cold Storage Facilities: Temperature-controlled environments with unique constraints:
- Temperature Zones: Multiple zones for different temperature requirements
- Airlock Systems: Minimizing temperature loss during transitions
- Condensed Footprint: Minimizing refrigerated space while maintaining efficiency
- Rapid Throughput: Reducing time products spend outside optimal temperatures
Key Performance Indicators for Layout Effectiveness
Measuring Layout Performance: Quantifiable metrics for evaluating and improving warehouse layouts:
Space Utilization Metrics:
Cube Utilization = (Used Cubic Space / Total Available Cubic Space) × 100
Storage Density = Number of Pallet Positions / Square Footage
Honeycombing Factor = (Empty Locations / Total Locations) × 100
Operational Efficiency Metrics:
- Picks per Hour: Measuring picking productivity by layout zone
- Travel Distance: Average distance per pick, order, or shift
- Dock-to-Stock Time: Speed of receiving and putaway processes
- Order Cycle Time: Total time from order receipt to shipment
Cost Performance Metrics:
- Cost per Square Foot: Total operational cost divided by facility size
- Labor Cost per Unit: Labor expenses per item handled
- Space Cost per SKU: Storage cost allocation by product
- Damage Rates by Zone: Identifying problem areas in layout
2 · ABC Analysis and Strategic Zoning
ABC analysis forms the cornerstone of intelligent warehouse layout design, enabling data-driven decisions about product placement and resource allocation based on item velocity and value.
Implementing ABC Analysis for Layout Optimization
The Pareto Principle in Warehousing: The 80/20 rule typically applies: 20% of SKUs generate 80% of activity:
Classification Methodology:
A Items (Fast Movers):
- Top 20% of SKUs by velocity
- 80% of total picks/movement
- Premium locations near shipping
- Maximum accessibility

B Items (Moderate Movers):
- Next 30% of SKUs
- 15% of total activity
- Secondary prime locations
- Good accessibility

C Items (Slow Movers):
- Remaining 50% of SKUs
- 5% of total activity
- Remote/high locations
- Basic accessibility
Multi-Criteria ABC Analysis: Beyond simple velocity, consider multiple factors:
| Criterion | Weight | A Items | B Items | C Items |
|---|---|---|---|---|
| Pick frequency | 40% | >100/day | 10-100/day | <10/day |
| Revenue contribution | 25% | Top 20% | Next 30% | Bottom 50% |
| Cube movement | 20% | High volume | Medium volume | Low volume |
| Profit margin | 15% | >30% | 15-30% | <15% |
Dynamic ABC Adjustment:
- Seasonal Patterns: Adjusting classifications for seasonal variations
- Promotional Items: Temporary reclassification for promotions
- New Product Introduction: Fast-tracking new items to appropriate zones
- Obsolescence Management: Downgrading declining products
Zone Design Strategies
Creating Efficient Zone Layouts: Strategic zoning improves efficiency and reduces errors:
Fast-Pick Zone Design: Concentrated area for high-velocity items:
- Golden Zone Placement: Items at waist height for ergonomic picking
- Batch Pick Configuration: Layout supporting multi-order picking
- Replenishment Access: Easy access for restocking without disrupting picking
- Technology Integration: Barcode scanners, pick-to-light systems, or voice picking
Bulk Storage Zone: High-density storage for reserve inventory:
- Vertical Maximization: Full height utilization with appropriate equipment
- Block Stacking: Dense storage for full pallets of single SKUs
- FIFO/FEFO Compliance: Layout supporting first-in-first-out rotation
- Equipment Optimization: Wide aisles for forklifts and reach trucks
Specialty Zones: Dedicated areas for specific requirements:
- Hazardous Materials: Segregated area with containment capabilities
- High-Value Items: Secure cages or restricted access zones
- Temperature-Controlled: Refrigerated or climate-controlled sections
- Oversized Items: Special racking or floor storage for large products
Slotting Optimization Techniques
Strategic Product Placement: Optimizing individual locations within zones:
Velocity-Based Slotting:
- Hot Picks: Eye-level, closest to packing/shipping
- Family Grouping: Related items picked together
- Size Progression: Small to large, light to heavy
- Picking Path: Following natural left-to-right, top-to-bottom patterns
Physical Characteristics Consideration:
Weight Distribution:
- Heavy items: Lower levels (knee to waist height)
- Medium items: Middle levels (waist to shoulder)
- Light items: Upper levels (shoulder and above)

Size Optimization:
- Match slot size to product dimensions
- Minimize wasted cube in locations
- Consider case vs. each picking requirements
Affinity Analysis: Items frequently ordered together should be positioned proximally:
- Market Basket Analysis: Identifying items commonly purchased together
- Kit Components: Grouping parts that form kits or assemblies
- Complementary Products: Positioning related items nearby
- Promotional Bundling: Temporary adjacency for promotional combinations
3 · Picking Path Optimization and Workflow Design
Efficient picking paths and workflows form the operational backbone of warehouse productivity, directly impacting labor costs, order accuracy, and customer service levels.
Picking Methodologies and Layout Implications
Single Order Picking: One order at a time, suitable for:
- Complex orders requiring attention
- Large/heavy items
- Custom configurations
- High-value products requiring verification
Layout Requirements:
- Wide Aisles: Accommodating order collection equipment
- Staging Areas: Temporary placement for picked items
- Verification Zones: Quality check points before shipping
- Direct Routes: Clear paths from picking to packing areas
Batch Picking: Multiple orders picked simultaneously:
Layout Optimization for Batch Picking:
Zone Configuration:
1. Dense pick faces for small items
2. Central collection points for batch sorting
3. Clear zone boundaries for picker assignment
4. Return paths that don't interfere with active picking

Cart/Tote Layout:
- Multiple tote positions on picking carts
- Clear labeling systems for order segregation
- Ergonomic heights for tote placement
- Easy cart navigation through aisles
Zone Picking: Pickers assigned to specific warehouse zones:
- Zone Boundaries: Clear physical or logical zone demarcation
- Consolidation Areas: Spaces where items from different zones merge
- Conveyor Integration: Automated movement between zones
- Buffer Zones: Temporary storage between picking waves
Wave Picking: Orders released in coordinated waves:
- Wave Staging: Pre-positioning of carts and equipment
- Synchronization Points: Areas where waves converge
- Priority Lanes: Express paths for urgent orders
- Wave Completion Zones: Areas for wave quality checks
Route Optimization Strategies
Minimizing Travel Distance: Mathematical approaches to routing efficiency:
S-Shape (Serpentine) Routing:
Advantages:
- Simple to understand and implement
- No backtracking within aisles
- Works well with wide aisles
- Suitable for high-density picking

Disadvantages:
- May require traveling entire aisle length
- Not optimal for selective picks
- Can create congestion at aisle ends
Return Routing: Enter and exit each aisle from the same end:
- Best for: Low-density picks, few items per aisle
- Layout Requirements: Wide cross-aisles at front
- Advantages: Minimal travel for sparse picks
- Limitations: Potential backtracking and congestion
Midpoint Routing: Divide warehouse at midpoint, pick front or back:
- Optimal for: Medium pick density
- Benefits: Reduces travel vs. S-shape for selective picks
- Requirements: Clear midpoint cross-aisle
- Complexity: More complex than basic methods
Optimal Routing: Algorithm-based shortest path calculation:
- Technology Required: WMS with optimization algorithms
- Benefits: Absolute minimum travel distance
- Challenges: Complex for manual implementation
- Best Practice: Combined with pick sequence optimization
Workflow Integration and Bottleneck Prevention
Identifying and Eliminating Bottlenecks: Strategic layout design to prevent operational constraints:
Common Bottleneck Areas:
| Location | Cause | Solution |
|---|---|---|
| Receiving doors | Limited dock capacity | Staggered scheduling, additional doors |
| Aisles intersections | Traffic congestion | One-way traffic patterns, wider intersections |
| Packing stations | Insufficient capacity | Additional stations, improved layout |
| Shipping staging | Space constraints | Expanded staging, better organization |
| Replenishment paths | Interference with picking | Dedicated replenishment aisles |
Workflow Balancing: Ensuring smooth flow throughout operations:
Capacity Planning Formula:
Required Capacity = (Average Daily Volume × Peak Factor) / (Available Hours × Efficiency Rate)

Example:
- Average daily orders: 1,000
- Peak factor: 1.5
- Available hours: 8
- Efficiency rate: 0.85
- Required capacity: 220 orders/hour
Buffer Zone Design: Strategic placement of buffer areas:
- Receiving Buffers: Temporary storage for inbound processing
- Pick Wave Buffers: Staging for batch release
- Packing Buffers: Queue management for packing stations
- Shipping Buffers: Organized staging by carrier/route
4 · Cross-Docking and Flow-Through Operations
Cross-docking represents a sophisticated approach to warehouse layout that minimizes storage time and accelerates product flow from receiving to shipping, requiring specialized design considerations.
Cross-Dock Facility Design Principles
Fundamental Layout Configurations: Different cross-dock shapes serve various operational needs:
I-Shape Configuration: Linear flow from one side to the other:
[Receiving Doors] ← Material Flow → [Shipping Doors]
        ↓                                    ↑
   [Inbound Staging] — [Sortation] — [Outbound Staging]
Advantages:
- Simple, intuitive flow
- Minimal crossing traffic
- Easy to manage and control
- Suitable for single-direction flow
L-Shape Configuration: Perpendicular receiving and shipping:
- Benefits: Accommodates site constraints, separates inbound/outbound traffic
- Challenges: More complex flow patterns, potential congestion at corner
- Best for: Facilities with specific site limitations or traffic patterns
T-Shape Configuration: Multiple flow directions from central sort:
- Applications: Multiple destination zones, varied product flows
- Advantages: Flexible routing options, good for diverse operations
- Requirements: Strong central sortation capabilities
X-Shape Configuration: Multiple receiving and shipping sides:
- Complexity: High operational complexity requiring sophisticated management
- Throughput: Maximum throughput capacity for high-volume operations
- Technology: Requires advanced WMS and sortation systems
- Flexibility: Accommodates various flow patterns simultaneously
Staging Area Optimization
Strategic Staging Zone Design: Temporary holding areas critical for cross-dock efficiency:
Inbound Staging:
Zone Allocation:
- Carrier-specific zones: Dedicated areas by transportation provider
- Product-type zones: Segregation by handling requirements
- Priority zones: Express/urgent shipment areas
- Quality check zones: Inspection areas for specific products

Size Calculation:
Staging Space = (Average Truck Contents × Dwell Time × Safety Factor) / Available Hours
Outbound Staging: Organization by destination and carrier:
| Zone Type | Purpose | Design Features |
|---|---|---|
| Route-based | Group by delivery route | Numbered lanes, clear marking |
| Carrier-based | Organize by shipping company | Dedicated doors, specific timing |
| Priority-based | Separate by service level | Express lanes, expedited access |
| Customer-based | Major customer allocations | Customized handling areas |
Dynamic Staging Strategies:
- Flex Zones: Adjustable boundaries based on volume
- Time-Based Allocation: Different zones for different shifts
- Seasonal Adjustment: Reconfiguration for peak periods
- Technology Integration: RFID/barcode tracking for location management
Door Allocation and Scheduling
Optimizing Dock Door Utilization: Strategic door assignment and scheduling maximizes throughput:
Door Assignment Strategies:
- Fixed Assignment: Permanent carrier/route assignments
- Flexible Assignment: Dynamic allocation based on needs
- Hybrid Approach: Core fixed assignments with flex capacity
- Exclusive Use: Dedicated doors for major customers/carriers
Scheduling Optimization:
Door Utilization Rate = (Actual Usage Hours / Available Hours) × 100

Target Utilization:
- Receiving: 70-80% (allows for delays/issues)
- Shipping: 80-90% (more predictable)
- Flex doors: 60-70% (buffer capacity)
Door Configuration Factors:
- Door Spacing: Adequate room for truck maneuvering
- Door Equipment: Levelers, seals, and restraint systems
- Internal Access: Clear paths from doors to staging/storage
- Technology: Door scheduling systems and yard management
5 · Storage System Selection and Configuration
The selection and configuration of storage systems fundamentally shapes warehouse operations, determining capacity, accessibility, and operational efficiency.
Racking Systems and Their Applications
Selective Pallet Racking: The most common storage system, offering direct access to every pallet:
Design Specifications:
- Aisle Width: 10-12 feet for standard forklifts, 8-10 feet for reach trucks
- Height Utilization: Up to 40 feet with appropriate equipment
- Load Capacity: 2,000-5,000 lbs per pallet position typical
- Selectivity: 100% - immediate access to any pallet
Optimal Applications:
- High SKU variety with low-medium velocity
- Variable pallet sizes and weights
- FIFO/FEFO requirement operations
- Facilities requiring maximum flexibility
Double-Deep Racking: Storing pallets two deep for increased density:
Density Improvement: 30-40% over selective racking
Selectivity Reduction: 50% - must move front pallet to access rear
Equipment Required: Deep-reach trucks or specialized attachments
Best For: Medium SKU variety with moderate velocity
Drive-In/Drive-Through Racking: High-density storage for homogeneous products:
| Type | Access Points | Inventory Rotation | Density |
|---|---|---|---|
| Drive-In | One side | LIFO only | 75% space utilization |
| Drive-Through | Both ends | FIFO possible | 70% space utilization |
Push-Back Racking: Gravity-flow system for 2-6 pallets deep:
- Advantages: Higher density than selective, better selectivity than drive-in
- Operation: Last-in-first-out by design
- Ideal for: Medium-velocity items with multiple pallets per SKU
- Density: 60-65% space utilization
Pallet Flow Racking: Gravity-fed system for first-in-first-out operation:
- Applications: High-velocity items, dated products, production support
- Density: Up to 80% space utilization
- Requirements: Consistent pallet sizes and weights
- Benefits: Automatic FIFO, reduced labor, high throughput
Small Parts Storage Solutions
Bin Shelving Systems: Organizing small, loose items efficiently:
Static Shelving Configuration:
Standard Dimensions:
- Depth: 12", 18", 24" typical
- Width: 36", 48" sections
- Height: 7-8 feet accessible, up to 12 feet with equipment
- Load Capacity: 300-750 lbs per shelf

Slotting Strategy:
- Eye level: Highest velocity items
- Waist level: Heavy small parts
- Low level: Bulky items
- High level: Slow-moving inventory
Modular Drawer Systems: High-density storage for small parts:
- Density Increase: 50-75% space savings over shelving
- Security: Lockable drawers for valuable items
- Organization: Dividers for multiple SKUs per drawer
- Ergonomics: Reduced bending and reaching
Carton Flow Rack: Gravity-fed systems for case picking:
- Pick Face Optimization: Continuous pick face presentation
- FIFO Maintenance: Automatic rotation
- Labor Reduction: Eliminated search time
- Ideal Products: Consistent case sizes, moderate-high velocity
Automated Storage and Retrieval Systems (AS/RS)
Types of AS/RS Solutions: Varying levels of automation for different needs:
Mini-Load AS/RS: For cases, totes, and small items:
- Throughput: 100-500 lines per hour per crane
- Height Utilization: Up to 60 feet typical
- Accuracy: 99.9%+ inventory accuracy
- ROI: 2-4 year payback typical
Unit-Load AS/RS: Full pallet automated storage:
- Applications: High-volume distribution, manufacturing support
- Benefits: Labor reduction, space optimization, inventory control
- Investment: High capital cost, long-term commitment
- Flexibility: Limited reconfiguration capability
Shuttle Systems: Semi-automated deep-lane storage:
- Flexibility: More adaptable than fixed AS/RS
- Scalability: Gradual automation possible
- Throughput: High-speed pallet movement
- Cost: Lower than full AS/RS
6 · Material Handling Equipment and Aisle Design
The relationship between material handling equipment and aisle configuration directly impacts space utilization, productivity, and safety in warehouse operations.
Aisle Width Optimization
Determining Optimal Aisle Dimensions: Balancing space efficiency with operational requirements:
Standard Aisle Classifications:
Wide Aisles: 11-13 feet
- Standard counterbalanced forklifts
- Two-way traffic possible
- Lower density, higher flexibility
- Suitable for varied load types

Narrow Aisles: 8-10 feet
- Reach trucks, order pickers
- One-way traffic only
- 20-25% space savings
- Height limitations based on equipment

Very Narrow Aisles (VNA): 5-7 feet
- Turret trucks, wire-guided systems
- 40-50% space savings
- Heights up to 50 feet
- High equipment investment
Aisle Width Calculation Formula:
Minimum Aisle Width = Truck Length + Load Length + 2(Clearance) + Safety Margin

Where:
- Clearance = 3-6 inches per side
- Safety Margin = 12-24 inches for operational comfort
Equipment Selection Criteria
Matching Equipment to Layout Requirements: Strategic equipment selection based on operational needs:
| Equipment Type | Aisle Width | Lift Height | Best Application | Throughput |
|---|---|---|---|---|
| Pallet Jack | N/A | Ground | Horizontal transport | High |
| Counterbalance Forklift | 11-13 ft | 20 ft | General purpose | Medium |
| Reach Truck | 8-10 ft | 30 ft | Selective racking | Medium-High |
| Order Picker | 8-10 ft | 30 ft | Case/each picking | Variable |
| Turret Truck | 5-7 ft | 50 ft | VNA operations | Medium |
| AGV/AMR | Variable | Variable | Repetitive routes | Continuous |
Total Cost of Ownership Considerations:
- Initial Investment: Purchase or lease costs
- Operating Costs: Fuel/electricity, maintenance, operator wages
- Training Requirements: Operator certification and ongoing training
- Flexibility: Ability to adapt to changing needs
- Technology Integration: Compatibility with WMS and automation
Traffic Flow Management
Designing Safe and Efficient Traffic Patterns: Preventing congestion and accidents through thoughtful design:
One-Way vs. Two-Way Systems:
One-Way Aisles:
Advantages:
- Predictable traffic flow
- Narrower aisle possible
- Reduced collision risk
- Easier to manage

Disadvantages:
- Longer travel distances
- Requires more planning
- Less flexibility
- More aisles needed

Two-Way Aisles:
Advantages:
- Shorter travel distances
- Greater flexibility
- Fewer aisles required
- Simpler for operators

Disadvantages:
- Wider aisles required
- Higher collision risk
- Traffic management needed
- Passing zones required
Intersection Design: Critical points requiring special attention:
- Visibility: Mirrors, warning lights, clear sightlines
- Right-of-Way: Clear rules and markings
- Speed Control: Speed bumps, warning signs
- Staging Areas: Space for equipment to wait safely
Pedestrian Safety: Separating foot traffic from equipment:
- Dedicated Walkways: Marked pedestrian paths
- Barriers: Physical separation where possible
- Crosswalks: Designated crossing points
- Visual/Audio Warnings: Alerts for blind spots
7 · Seasonal Flexibility and Dynamic Layouts
Modern warehouses must adapt to significant fluctuations in volume, product mix, and operational requirements throughout the year, requiring flexible design strategies.
Planning for Peak Seasons
Capacity Expansion Strategies: Preparing for volume surges without permanent overcapacity:
Flexible Zone Designation:
Normal Operations (65% of year):
- Standard pick zones: 40% of space
- Reserve storage: 35% of space
- Shipping/receiving: 15% of space
- Support areas: 10% of space

Peak Operations (35% of year):
- Expanded pick zones: 55% of space
- Reduced reserve: 25% of space
- Extended staging: 15% of space
- Overflow areas: 5% of space
Temporary Storage Solutions:
- Portable Racking: Temporary racking systems for peak periods
- Floor Stacking: Designated areas for temporary floor storage
- Outside Storage: Trailers or containers for overflow inventory
- Mezzanine Activation: Seasonal use of mezzanine levels
Labor Zone Flexibility: Accommodating workforce fluctuations:
| Season Phase | Staffing Level | Layout Adjustment |
|---|---|---|
| Pre-peak | 100% | Setup temporary zones |
| Peak ramp-up | 150% | Activate overflow areas |
| Peak maximum | 200% | Full facility utilization |
| Peak ramp-down | 150% | Consolidate operations |
| Post-peak | 100% | Return to standard layout |
Modular and Reconfigurable Designs
Building Flexibility into Warehouse Layouts: Design elements that enable rapid reconfiguration:
Modular Racking Systems:
- Adjustable Components: Beam heights, bay widths adaptable
- Portable Sections: Racking on wheels for repositioning
- Convertible Systems: Switching between storage types
- Expansion Capability: Easy addition/removal of sections
Flexible Technology Infrastructure:
Power and Data:
- Overhead power drops vs. floor-mounted
- Wireless networks for mobility
- Modular conveyor sections
- Portable workstations

Lighting:
- Adjustable LED systems
- Motion-activated zones
- Task-specific lighting
- Natural light optimization
Multi-Purpose Zones: Areas designed for various functions:
- Flex Space: Open areas convertible for different uses
- Swing Zones: Alternating between storage and processing
- Seasonal Activation: Dormant areas activated as needed
- Shared Resources: Equipment/space serving multiple functions
Dynamic Slotting Strategies
Adaptive Product Placement: Responding to changing velocity patterns:
Velocity-Based Reslotting Triggers:
- Sales Pattern Changes: 20% velocity change triggers review
- Seasonal Transitions: Quarterly slotting updates
- Promotional Periods: Temporary forward positioning
- New Product Introduction: Fast-track placement for launches
ABC Zone Migration:
Migration Process:
1. Monitor velocity trends (weekly/monthly)
2. Identify classification changes
3. Plan movement during low-activity periods
4. Execute moves in phases
5. Update WMS locations
6. Verify pick path optimization
Technology-Enabled Flexibility:
- Digital Pick Lists: Dynamic routing based on current locations
- Mobile Racking: RFID-enabled moveable locations
- Virtual Zones: Software-defined zones vs. physical
- Real-Time Optimization: Continuous slotting adjustments
8 · Technology Integration in Layout Design
Modern warehouse layouts must accommodate current technology while maintaining flexibility for future innovations, requiring thoughtful integration of digital and physical infrastructure.
Warehouse Management System (WMS) Layout Integration
Digital Twin Mapping: Creating accurate digital representations of physical layouts:
Location Hierarchy Structure:
Facility
└── Zone (Receiving, Storage, Picking, Shipping)
    └── Area (A1, A2, B1, B2)
        └── Aisle (01, 02, 03)
            └── Bay (A, B, C)
                └── Level (1, 2, 3, 4)
                    └── Position (Left, Center, Right)

Example Location: WHSE1-PICK-A2-03-B-2-L
WMS Configuration Requirements:
- Location Attributes: Size, weight capacity, temperature, security level
- Product Restrictions: Hazmat segregation, temperature requirements
- Equipment Assignments: Designated equipment by zone
- Velocity Classifications: ABC designations in system
- Replenishment Rules: Min/max levels, trigger points
Automation and Robotics Considerations
Layout Design for Automation: Preparing facilities for current and future automation:
AMR/AGV Path Planning:
- Guide Path Infrastructure: Magnetic tape, wire, or natural navigation
- Charging Stations: Strategic placement for continuous operation
- Traffic Management: Intersection control, passing zones
- Safety Zones: Human-robot interaction areas
Conveyor System Integration:
Design Considerations:
- Elevation changes for overhead clearance
- Merge and divert points
- Accumulation zones
- Manual intervention points
- Maintenance access
- Emergency stops
Pick-to-Light/Put-to-Light Systems:
- Module Placement: Ergonomic positioning in pick faces
- Power/Data Infrastructure: Cabling requirements
- Zone Controllers: Strategic placement for response time
- Display Visibility: Optimal viewing angles and lighting
IoT and Sensor Deployment
Smart Warehouse Infrastructure: Embedding intelligence throughout the facility:
Environmental Monitoring:
| Sensor Type | Purpose | Placement Strategy |
|---|---|---|
| Temperature | Climate control | Grid pattern, critical zones |
| Humidity | Product protection | Storage areas, dock doors |
| Motion | Security, automation | Perimeter, high-value zones |
| Weight | Inventory tracking | Rack positions, floor scales |
| Light | Energy management | Throughout facility |
Asset Tracking Systems:
- RFID Infrastructure: Reader placement for full coverage
- Bluetooth Beacons: Indoor positioning systems
- Camera Networks: Vision systems for tracking and security
- GPS Integration: Yard management and trailer tracking
Data Collection Points:
Strategic Placement:
- Entry/exit portals for automatic scanning
- Critical workflow transitions
- Quality check stations
- High-velocity pick faces
- Shipping verification points
9 · Space Utilization Analysis and Metrics
Quantifying and optimizing space utilization requires systematic measurement and analysis of multiple dimensions of warehouse performance.
Measuring Space Efficiency
Comprehensive Space Metrics: Understanding true space utilization beyond simple floor coverage:
Cubic Space Utilization:
Calculation Method:
Total Cubic Capacity = Length × Width × Clear Height
Used Cubic Space = Σ(Item Volume × Quantity)
Cubic Utilization % = (Used Cubic Space / Total Cubic Capacity) × 100

Industry Benchmarks:
- Traditional warehouse: 20-25%
- Optimized layout: 35-45%
- Automated facility: 50-60%
Honeycombing Analysis: Identifying and eliminating wasted space:
- Horizontal Honeycombing: Empty locations within pick faces
- Vertical Honeycombing: Unused height in locations
- Temporal Honeycombing: Locations empty during certain periods
- Measurement: Regular photography and system audits
Functional Space Allocation:
| Function | Typical % | Optimized % | Best Practice % |
|---|---|---|---|
| Storage | 45-50% | 50-55% | 55-65% |
| Aisles | 25-30% | 20-25% | 15-20% |
| Receiving | 10-12% | 8-10% | 7-9% |
| Shipping | 10-12% | 8-10% | 7-9% |
| Value-add | 3-5% | 5-7% | 6-8% |
| Office | 2-3% | 2-3% | 1-2% |
Capacity Planning and Forecasting
Strategic Capacity Management: Planning for current and future space requirements:
Storage Capacity Calculation:
Current Capacity Assessment:
- Pallet positions: Count of available slots
- Weight capacity: Total weight facility can support
- Volume capacity: Cubic feet available
- Throughput capacity: Maximum daily processing

Future Needs Projection:
Required Capacity = Current Volume × (1 + Growth Rate)^Years × Seasonality Factor

Example:
- Current: 10,000 pallets
- Growth: 15% annually
- Timeline: 3 years
- Peak factor: 1.4
- Required: 10,000 × 1.52 × 1.4 = 21,280 pallets
Throughput vs. Storage Trade-offs:
- High Throughput Design: More aisles, less storage density
- High Storage Design: Fewer aisles, more storage density
- Balanced Approach: Optimize based on business model
- Dynamic Adjustment: Seasonal rebalancing of priorities
Continuous Improvement Methodologies
Systematic Layout Optimization: Regular review and enhancement processes:
Layout Audit Process:
Quarterly Review Checklist:
□ Space utilization metrics update
□ Travel distance analysis
□ Bottleneck identification
□ Damage incident mapping
□ Productivity zone analysis
□ Technology integration assessment
□ Safety incident review
□ Energy consumption patterns
Improvement Identification Matrix:
| Issue | Impact | Effort | Priority | Solution |
|---|---|---|---|---|
| Long pick paths | High | Low | 1 | Reslot high-velocity items |
| Congested aisles | High | Medium | 2 | Implement one-way traffic |
| Low vertical use | Medium | High | 3 | Install taller racking |
| Staging bottleneck | High | Low | 1 | Expand staging area |
Kaizen Events for Layout:
- Value Stream Mapping: Document current material flow
- Waste Identification: Find non-value-added movements
- Solution Development: Brainstorm improvement ideas
- Pilot Testing: Test changes in limited area
- Full Implementation: Roll out successful improvements
10 · Safety and Compliance in Layout Design
Safety considerations must be integral to warehouse layout design, not only for regulatory compliance but for operational efficiency and employee wellbeing.
OSHA Requirements and Best Practices
Regulatory Compliance Standards: Meeting and exceeding safety requirements:
Aisle and Passageway Requirements:
OSHA Standards:
- Minimum width: 3 feet for pedestrian
- Equipment clearance: Equipment width + 3 feet
- Emergency egress: 28 inches minimum
- Overhead clearance: 8 feet minimum

Best Practices:
- Main aisles: 12-14 feet
- Cross aisles: 10-12 feet
- Pedestrian lanes: 4-6 feet
- Emergency routes: 44 inches minimum
Material Storage Standards:
- Stacking Heights: 16 feet maximum for manual handling
- Stack Stability: 6:1 height-to-base ratio maximum
- Load Limits: Posted weight capacities for all storage
- Clearances: 18 inches below sprinklers, 3 feet from electrical
Fire Safety and Emergency Planning
Fire Prevention Through Design: Strategic layout elements for fire safety:
Sprinkler System Clearances:
| Storage Type | Clearance Required | Layout Impact |
|---|---|---|
| Standard commodities | 18 inches | Limits rack height |
| High-hazard materials | 36 inches | Requires special zones |
| In-rack sprinklers | 6 inches | Allows taller storage |
| ESFR systems | 36 inches | Maximum height utilization |
Emergency Evacuation Design:
- Exit Placement: Maximum 200 feet travel to exit
- Exit Visibility: Clear sight lines and illuminated signs
- Assembly Points: Designated outdoor gathering areas
- Emergency Equipment: Strategic placement of extinguishers, AEDs
- Communication Systems: PA systems, emergency phones
Hazardous Material Storage
Segregation and Containment: Proper layout for dangerous goods:
Chemical Storage Zones:
Segregation Requirements:
- Incompatible materials: Separate by 20 feet or fire wall
- Flammables: Dedicated fire-rated room
- Corrosives: Containment systems required
- Oxidizers: Isolated from combustibles

Design Features:
- Secondary containment
- Ventilation systems
- Spill response stations
- Emergency shower/eyewash
- Specialized racking
Documentation and Signage:
- NFPA Diamonds: Hazard identification placards
- SDS Stations: Safety Data Sheet accessibility
- Evacuation Routes: Posted and illuminated
- Emergency Procedures: Visible action plans
- Contact Information: Emergency response numbers
11 · Cost-Benefit Analysis of Layout Changes
Quantifying the financial impact of layout modifications ensures sound investment decisions and measurable returns.
ROI Calculation for Layout Projects
Comprehensive Cost Analysis: Understanding total project investment:
Direct Implementation Costs:
Cost Categories:
- Equipment purchases/leases
- Racking and storage systems
- Installation labor
- Technology integration
- Permits and inspections
- Consultant fees

Example Calculation:
New VNA System Implementation
- Racking: $150,000
- Turret trucks (3): $450,000
- Wire guidance: $75,000
- WMS updates: $25,000
- Installation: $50,000
- Training: $15,000
Total Investment: $765,000
Operational Savings Quantification:
| Benefit Category | Annual Savings | Calculation Method |
|---|---|---|
| Labor reduction | $200,000 | 4 FTEs × $50,000 |
| Space savings | $120,000 | 10,000 sq ft × $12/sq ft |
| Damage reduction | $30,000 | 50% reduction in incidents |
| Energy savings | $15,000 | Reduced lighting/HVAC |
| Total Annual | $365,000 | ROI: 2.1 years |
Indirect Benefits:
- Improved accuracy: Reduced error-related costs
- Customer satisfaction: Better service levels
- Safety improvements: Lower insurance premiums
- Scalability: Deferred expansion needs
Phased Implementation Strategies
Managing Change and Investment: Gradual implementation to minimize disruption and spread costs:
Phase 1: Quick Wins (Months 1-3)
Focus: Low-cost, high-impact changes
- ABC reslotting
- Aisle marking improvements
- Basic flow optimization
- Signage updates
Investment: <$25,000
Impact: 10-15% efficiency gain
Phase 2: Moderate Changes (Months 4-9)
- Selective re-racking: High-velocity zones
- Technology pilots: Pick-to-light in one zone
- Layout adjustments: Expanding key areas
- Investment: $100,000-250,000
- Impact: Additional 15-20% improvement
Phase 3: Major Transformation (Months 10-18)
- Full automation implementation
- Complete layout reconfiguration
- Advanced technology deployment
- Investment: $500,000+
- Impact: 40-50% total improvement
Performance Monitoring and Validation
Measuring Layout Improvement Success: Tracking metrics to validate improvements:
Baseline Establishment:
Pre-Implementation Metrics:
- Picks per hour: Document current rates
- Travel distance: Measure via sampling
- Space utilization: Calculate current %
- Error rates: Track picking accuracy
- Damage incidents: Record frequency
- Labor hours: Track by function
Post-Implementation Tracking:
- Daily Monitoring: Key operational metrics
- Weekly Analysis: Trend identification
- Monthly Reporting: Comprehensive performance review
- Quarterly Optimization: Fine-tuning based on data
- Annual Assessment: Full ROI validation
12 · Case Studies and Best Practices
Real-world examples demonstrate successful layout optimization strategies and their tangible results.
E-Commerce Fulfillment Center Optimization
Company Profile: Major online retailer with 500,000 sq ft distribution center
Challenge:
- 300% growth in three years
- Same-day delivery requirements
- 50,000 SKU range
- Seasonal peaks 3x normal volume
Solution Implementation:
Layout Transformation:
1. Forward pick zone expansion (15,000 → 30,000 sq ft)
2. Goods-to-person robotics for top 20% SKUs
3. Mezzanine addition for slow movers
4. Dynamic slotting system implementation
5. Cross-dock capabilities for high-velocity items
Results Achieved:
| Metric | Before | After | Improvement |
|---|---|---|---|
| Picks/hour/person | 65 | 180 | 177% |
| Space utilization | 45% | 72% | 60% |
| Order cycle time | 4 hours | 1.5 hours | 63% |
| Accuracy rate | 98.2% | 99.7% | 1.5% |
| Peak capacity | 15,000 orders | 45,000 orders | 200% |
Manufacturing Support Warehouse Redesign
Company Profile: Automotive parts manufacturer supporting JIT production
Challenge:
- Supporting 24/7 production lines
- 2-hour replenishment windows
- Mixed pallet/case/each picking
- Strict FIFO requirements
Strategic Approach:
Zone Reconfiguration:
- Supermarket concept for production support
- Kanban-triggered replenishment
- Dedicated milk-run staging
- Quality inspection integration
- Returns processing area
Implementation Highlights:
- Sequenced Delivery Zones: Matching production line sequence
- Buffer Management: Strategic safety stock placement
- Visual Management: Color-coded zones and kanban boards
- Tugger Train Routes: Optimized paths for regular runs
Outcomes:
- Line stoppages: Reduced by 85%
- Inventory turns: Increased from 12 to 24
- Labor efficiency: 30% improvement
- Space reduction: 25% less space required
Cold Storage Facility Layout Innovation
Company Profile: Food distributor with multi-temperature requirements
Unique Challenges:
- Three temperature zones (frozen, refrigerated, ambient)
- Minimizing temperature transitions
- Energy cost management
- Food safety compliance
- Limited expansion possibilities
Innovative Solutions:
Temperature Zone Optimization:
Ambient (30% of facility)
├── Receiving buffer
├── Dry goods storage
└── Shipping consolidation

Refrigerated (40% of facility)
├── Produce zones
├── Dairy/deli areas
└── Cross-dock operations

Frozen (30% of facility)
├── Deep freeze storage
├── Ice cream speciality
└── Blast freeze capability
Energy-Efficient Design Features:
- Airlocks: Between all temperature zones
- Vertical Storage: Maximizing cube in expensive cooled space
- Rapid Doors: High-speed doors minimizing air exchange
- LED Lighting: Motion-activated, low-heat emission
- Insulation Upgrades: R-value optimization
Results:
- Energy costs: 23% reduction
- Throughput: 35% increase
- Temperature compliance: 99.9% achievement
- Product damage: 40% reduction
13 · Future Trends in Warehouse Layout Design
Emerging technologies and changing market demands are reshaping warehouse design principles and creating new optimization opportunities.
Next-Generation Automation Impact
Layout Implications of Advanced Robotics: How emerging automation changes design requirements:
Goods-to-Person Systems:
Traditional Layout:
- Wide aisles for human pickers
- Ergonomic shelf heights
- Sequential pick paths
- Manual replenishment

G2P Layout:
- Dense storage grids
- Robot-only zones
- Workstation design
- Automated replenishment
- 60-70% space reduction
Autonomous Mobile Robots (AMRs):
- Dynamic Paths: No fixed infrastructure required
- Mixed Operations: Humans and robots sharing space
- Charging Infrastructure: Strategic charging station placement
- Safety Zones: Collaborative workspace design
Micro-Fulfillment Centers
Urban Warehouse Design: Compact facilities for last-mile delivery:
Design Characteristics:
| Element | Traditional DC | Micro-Fulfillment |
|---|---|---|
| Size | 200,000+ sq ft | 10,000-20,000 sq ft |
| Locations | Suburban | Urban core |
| Automation | Moderate | High |
| SKU range | 50,000+ | 5,000-10,000 |
| Inventory turns | 12-24 | 50-100 |
Layout Principles:
- Vertical Maximization: Using full building height
- Automated Storage: AS/RS or robotic systems
- Minimal Staging: Direct to delivery vehicle
- Customer Interface: Potential pickup capabilities
Sustainable Design Principles
Environmental Considerations in Layout: Designing for sustainability and efficiency:
Energy-Efficient Layouts:
Natural Lighting Optimization:
- Skylight placement for high-activity zones
- Light wells in multi-story facilities
- Translucent panels in walls
- LED supplementation only

Airflow Design:
- Natural ventilation paths
- Thermal stratification management
- Door placement for cross-ventilation
- HVAC zone optimization
Circular Economy Features:
- Reverse Logistics Zones: Dedicated returns processing
- Recycling Integration: Built-in waste management
- Packaging Optimization: Reusable container systems
- Water Management: Rainwater harvesting, greywater systems
14 · Implementation Roadmap and Checklist
A systematic approach to warehouse layout optimization ensures successful transformation while minimizing operational disruption.
Pre-Implementation Assessment
Current State Analysis Checklist:
- ☐ Document existing layout with accurate measurements
- ☐ Map current material flows and volumes
- ☐ Identify and quantify pain points
- ☐ Measure baseline performance metrics
- ☐ Assess current technology capabilities
- ☐ Review safety incidents and compliance issues
- ☐ Analyze seasonal patterns and peak requirements
- ☐ Calculate current space utilization
- ☐ Inventory equipment and infrastructure
- ☐ Survey employee feedback on layout issues
Design and Planning Phase
Layout Development Process:
Week 1-2: Data Analysis
- Analyze historical movement data
- Conduct ABC analysis
- Calculate space requirements
- Project future growth needs

Week 3-4: Concept Development
- Create multiple layout options
- Model material flows
- Simulate performance scenarios
- Estimate costs and benefits

Week 5-6: Stakeholder Review
- Present options to management
- Gather operational feedback
- Refine preferred concept
- Finalize implementation plan
Implementation Execution
Phased Rollout Strategy:
- ☐ Communicate plan to all stakeholders
- ☐ Order equipment and materials
- ☐ Schedule installation during low-activity periods
- ☐ Implement pilot zone first
- ☐ Train staff on new layouts and procedures
- ☐ Update WMS with new locations
- ☐ Conduct safety walk-throughs
- ☐ Monitor initial performance closely
- ☐ Adjust based on early results
- ☐ Roll out to additional zones
- ☐ Document lessons learned
- ☐ Celebrate implementation milestones
Post-Implementation Optimization
Continuous Improvement Activities:
30-Day Review:
- Performance against targets
- Employee adaptation assessment
- Initial problem resolution
- Quick-win adjustments

90-Day Review:
- Comprehensive metric analysis
- Process refinement opportunities
- Training reinforcement needs
- System optimization

Annual Review:
- Full ROI validation
- Strategic alignment check
- Future improvement planning
- Best practice documentation
15 · Conclusion and Strategic Recommendations
Key Success Principles
Foundation for Optimization: Successful warehouse layout optimization requires systematic approach combining data analysis, operational expertise, and change management:
- Data-Driven Decisions: Base layout changes on quantifiable metrics and thorough analysis
- Stakeholder Engagement: Involve operations teams throughout design process
- Phased Implementation: Minimize disruption through gradual transformation
- Technology Integration: Consider current and future automation requirements
- Flexibility Priority: Design for adaptability to changing business needs
- Safety First: Never compromise safety for efficiency gains
- Continuous Improvement: View layout optimization as ongoing process
Strategic Recommendations by Facility Type
High-Velocity Distribution Centers:
- Focus on flow-through capabilities and cross-docking
- Invest in goods-to-person automation for top movers
- Design wide aisles for high-throughput operations
- Implement dynamic slotting systems
Multi-Channel Fulfillment Centers:
- Create separate zones for B2B and B2C operations
- Design flexible spaces for seasonal adjustments
- Invest in technology for order consolidation
- Plan for returns processing integration
Manufacturing Support Warehouses:
- Align layout with production schedules
- Implement supermarket concepts for line supply
- Design for JIT/JIS delivery requirements
- Focus on FIFO/FEFO compliance
Cold Storage Facilities:
- Minimize temperature transition zones
- Maximize vertical storage in refrigerated areas
- Invest in energy-efficient technologies
- Design for strict compliance requirements
Future-Proofing Your Layout
Preparing for Tomorrow’s Challenges: Design decisions today must accommodate future evolution:
Flexibility Factors:
- Modular racking systems
- Excess electrical/data capacity
- Clear height maximization
- Expansion zones identified
- Technology-ready infrastructure
- Adaptable workflow patterns
Final Thoughts
Warehouse layout optimization represents a critical lever for operational excellence, directly impacting productivity, accuracy, and customer service. The principles and practices outlined in this manual provide comprehensive framework for analyzing, designing, and implementing efficient warehouse layouts.
Success requires balancing multiple objectives—space efficiency, operational productivity, safety compliance, and financial returns—while maintaining flexibility for future adaptation. Organizations that approach layout optimization strategically, with careful planning and systematic execution, achieve significant competitive advantages through superior operational performance.
The warehouse of the future will continue evolving with advancing technology, changing customer expectations, and new business models. However, the fundamental principles of efficient layout design—minimizing travel, maximizing space utilization, ensuring safety, and enabling smooth material flow—remain constant.
Whether planning new facility construction, expanding existing operations, or optimizing current layouts, the frameworks and methodologies presented here provide solid foundation for success. The key lies not in perfect implementation of every principle, but in thoughtful application of appropriate strategies for your specific operational context.
This comprehensive manual serves as a reference guide for warehouse layout optimization and space efficiency improvement. While we strive to provide thorough and practical guidance, each facility’s requirements are unique, and specific situations may benefit from customized approaches. Our team of warehouse design specialists stands ready to support your organization in developing and implementing layout optimization strategies tailored to your specific operational needs and objectives.
For organizations seeking additional support in warehouse layout design, space optimization, or operational efficiency improvement, we welcome the opportunity to share our expertise and collaborate on creating world-class warehouse operations that drive business success.